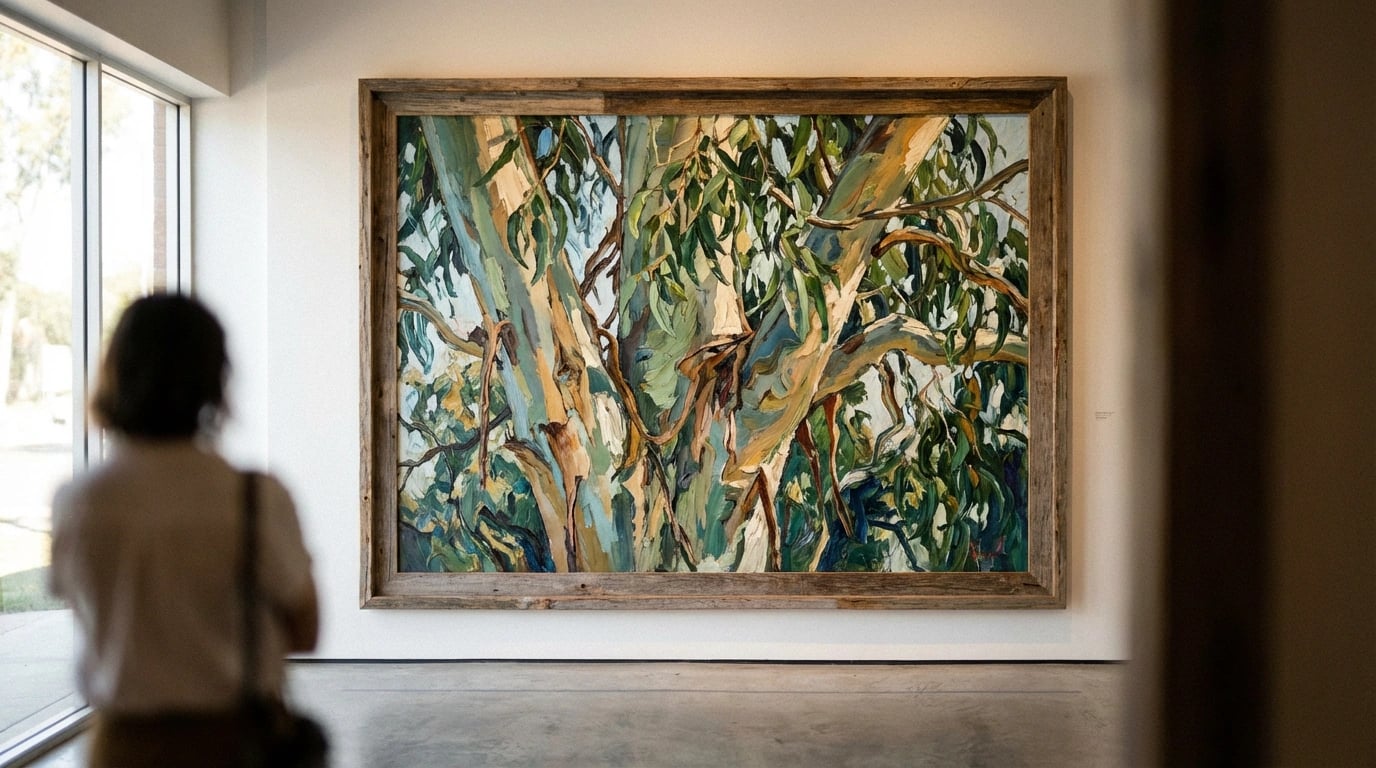
The Australian landscape holds a distinctive character that captivates artists worldwide, and at its heart stands the iconic eucalyptus tree. These magnificent natives dominate the bush, their silvery-green canopies and sculptural trunks creating scenes that are uniquely Australian. Learning to paint eucalyptus trees authentically transforms your landscape art from merely depicting trees to capturing the very essence of Australia’s natural beauty.
Mastering eucalyptus in landscape painting requires understanding their unique growth patterns, colour palettes, and environmental presence. This comprehensive guide will walk you through essential techniques for capturing these iconic trees, from initial sketching to final touches. Whether you’re working with oils, acrylics, or watercolours, these proven methods will help you create authentic Australian landscape paintings that resonate with the character of the bush.
Understanding Eucalyptus Structure and Form
Before touching brush to canvas, you must observe how eucalypts differ fundamentally from European and Northern Hemisphere trees. Their structure defies traditional tree-painting conventions, presenting unique challenges and opportunities for artists.
Step 1: Study the Angular Branch Structure
Begin by sketching eucalypt branches in your sketchbook. Notice how they grow at distinctive angles rather than the typical upward sweep of many deciduous trees. Australian gums often feature branches that extend horizontally or even droop downwards, creating characteristic silhouettes against the sky. Spend at least thirty minutes observing real eucalypts or quality photographic references, noting how the branches divide and subdivide.
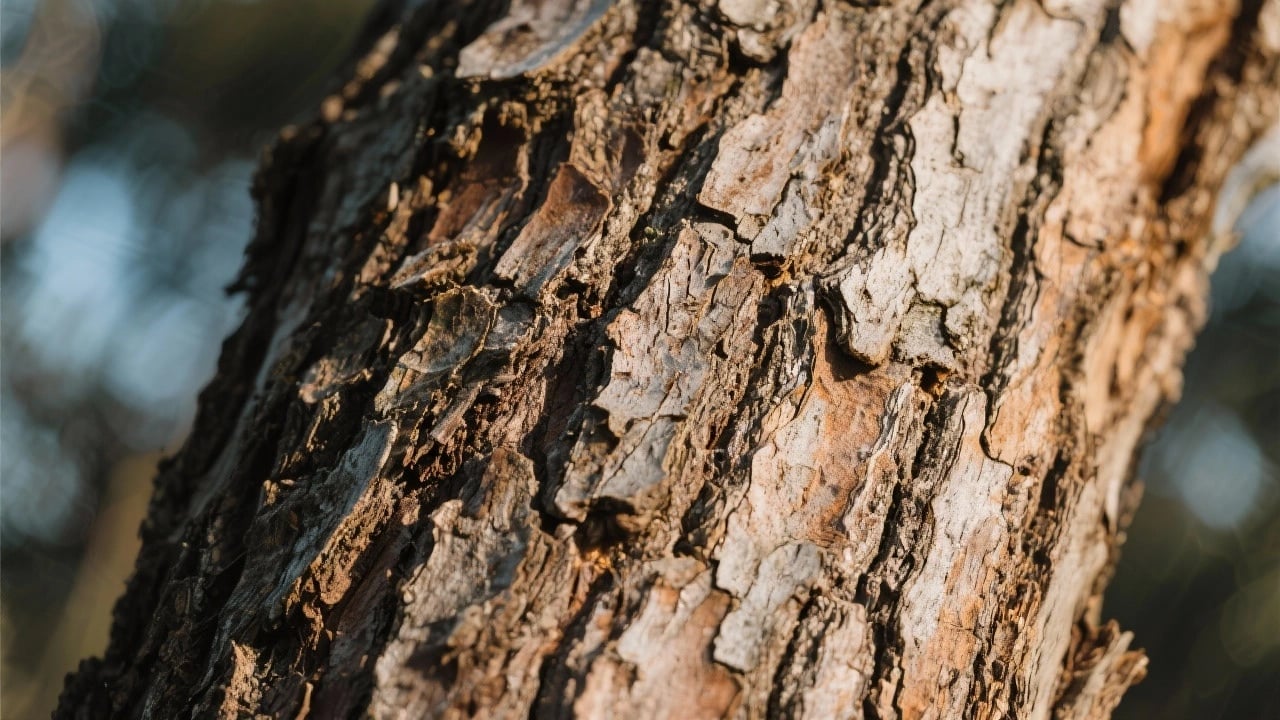
Step 2: Map the Trunk Characteristics
Eucalypt trunks vary dramatically between species. Some feature smooth, mottled bark in creams and greys, whilst others display rough, deeply fissured textures. Sketch the trunk structure, paying attention to how the bark peels, revealing layers beneath. Moreover, note the often-irregular lean of mature eucalypts, which rarely grow perfectly vertical.
Understanding these structural elements separates authentic Australian landscape art from generic tree paintings. Consequently, your preliminary sketches become the foundation for convincing eucalypt portraiture. Different eucalyptus species offer distinct characteristics that inform your artistic choices.
Building Your Australian Colour Palette
The Australian landscape demands a unique palette that differs significantly from European landscape traditions. Therefore, selecting the right colours is crucial for authentic representation.
Essential Colours for Eucalyptus Painting
Your palette should include these fundamental colours:
- Ultramarine blue and cobalt blue for atmospheric perspective
- Yellow ochre and raw sienna for golden light
- Burnt sienna and burnt umber for bark tones
- Viridian green and sap green for foliage bases
- Titanium white for mixing silvery greens
- Payne’s grey for shadows and depth
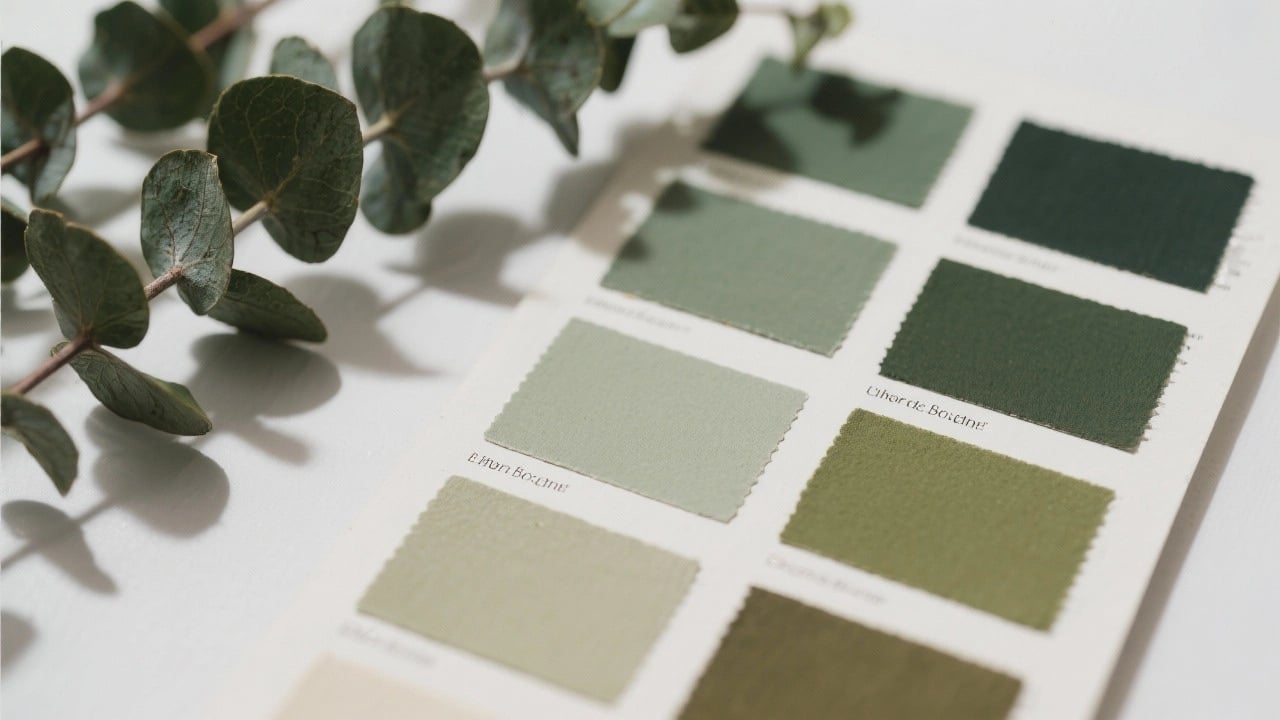
Step 3: Mix Authentic Eucalypt Greens
Avoid using greens straight from the tube. Instead, create eucalyptus greens by mixing viridian or sap green with generous amounts of white and touches of yellow ochre. Add small amounts of blue to create cooler, silvery tones characteristic of many gum species. Test your mixes on scrap paper, comparing them to actual eucalypt leaves or reliable photographic references.
Australian light possesses a brilliant, clear quality that influences all colours in the landscape. As a result, your mixed greens should appear lighter and more desaturated than traditional landscape foliage colours. Furthermore, incorporating warm ochres and siennas throughout your palette unifies the composition with that distinctive Australian golden glow.
Composing Your Australian Landscape
Effective composition transforms a simple tree study into compelling landscape art. The placement and arrangement of eucalypts within your frame determines the emotional impact of your painting.
Step 4: Establish Your Focal Point
Select one or two hero eucalypts as your primary focus. Position these using the rule of thirds rather than centring them directly. Sketch these main trees with more detail and stronger tonal contrast than surrounding elements. Additionally, consider the negative space created by branch structures, as these gaps contribute significantly to the composition’s visual interest.
Step 5: Create Depth Through Layering
Build depth by establishing distinct foreground, middle ground, and background layers. Foreground eucalypts should display detailed bark texture and darker values. Middle ground trees receive moderate detail, whilst background eucalypts become progressively lighter and bluer through atmospheric perspective. This layering technique mirrors how atmospheric perspective affects distant landscape elements.
Consider the horizon line placement carefully. A lower horizon emphasises dramatic sky and tall tree forms, whilst a higher horizon showcases the distinctive character of the Australian bush floor. Subsequently, this decision shapes the entire narrative of your painting.
Painting Eucalyptus Trunks and Bark
The trunk establishes the tree’s character and presence. Consequently, mastering bark texture and colour variations proves essential for convincing eucalypt representation.
Step 6: Block in Base Trunk Colours
Begin with a mid-tone base that reflects your eucalypt species. For smooth-barked varieties like scribbly gum, use mixtures of white, yellow ochre, and touches of burnt sienna. For stringybarks or ironbarks, start with raw umber and burnt umber combinations. Apply this base colour loosely, allowing some canvas texture to show through.
Adding Texture and Dimension
Step 7: Build Bark Texture Gradually
Layer darker tones into shadow areas using burnt umber mixed with ultramarine blue. For smooth-barked eucalypts, add irregular patches and mottling with varied greys, creams, and pale ochres. Use a dry-brush technique to suggest peeling bark. For rough-barked species, apply thicker paint with palette knife edges to create physical texture, building up ridges and furrows that catch light realistically.
Remember that eucalypt trunks rarely appear uniform in colour. Therefore, incorporate subtle colour variations throughout, adding warmth where light strikes directly and cooler tones in shadowed areas. Moreover, the reflected light from surrounding foliage often tints trunk shadows with gentle greens or blues.
Mastering Eucalypt Foliage Techniques
Eucalypt foliage presents unique challenges due to its distinctive appearance and the dappled light it creates. Unlike dense deciduous canopies, eucalypt foliage appears more open and airy.
Step 8: Establish Foliage Masses
Block in overall foliage shapes using your pre-mixed silvery greens. Work loosely at this stage, establishing the general cloud-like masses rather than individual leaves. Leave gaps between foliage clumps to suggest the open, transparent quality of eucalypt canopies. Furthermore, vary your green mixtures throughout, incorporating warmer yellowy-greens where light penetrates and cooler blue-greens in shadow areas.
Step 9: Add Foliage Detail and Highlights
Once your foliage masses are established, add suggestion of leaf clusters using small, directional brushstrokes. Eucalypt leaves hang vertically or at angles rather than lying horizontal, so your strokes should reflect this characteristic. Add highlights to sunlit foliage edges using lighter, warmer greens mixed with yellow ochre and white. Similarly, deepen shadows with darker greens mixed from viridian and burnt umber.
The characteristic silvery shimmer of eucalypt leaves comes from their waxy coating. Therefore, incorporate reflected light within shadow areas and occasional bright highlights that suggest this reflective quality. This technique connects beautifully with botanical art approaches that emphasise the unique qualities of Australian flora.
Creating Australian Light and Atmosphere
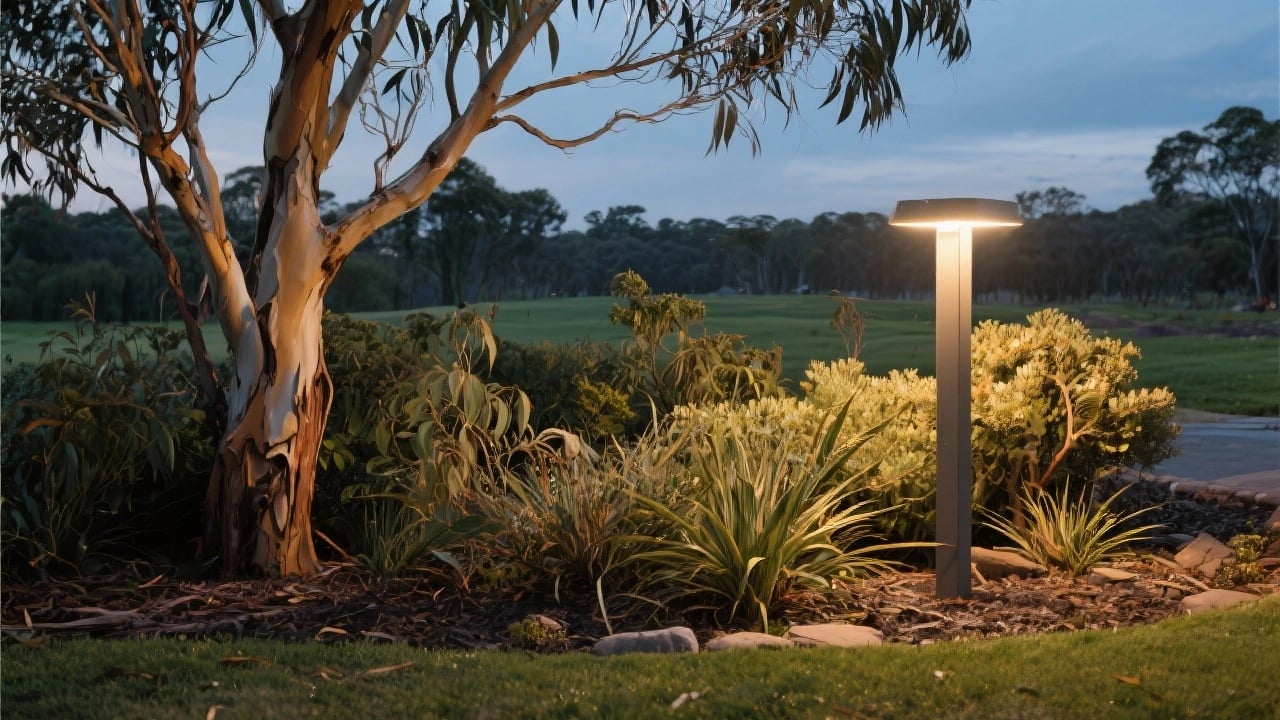
The quality of light fundamentally shapes Australian landscape painting. Bright, clear sunlight creates strong contrasts and vibrant colours that distinguish Australian scenes from softer European landscapes.
Step 10: Establish Strong Value Contrast
Australian sunlight creates dramatic shadows. Push your darks darker than feels comfortable initially, particularly in shadow areas beneath eucalypt canopies and within foliage masses. Conversely, keep sunlit areas bright and vibrant. This strong value contrast captures the intensity of Australian light more effectively than subtle gradations.
Painting the Australian Sky
The sky provides crucial context for your eucalypts. Australian skies often display intense blue in upper regions, becoming paler and warmer near the horizon. Mix cobalt blue with white for the upper sky, gradually introducing more white and touches of yellow ochre as you approach the horizon line.
Step 11: Add Atmospheric Haze
Australian eucalypt forests often display a characteristic blue haze caused by oil vapours from the trees. Add this effect to distant eucalypts by glazing thin layers of diluted ultramarine blue mixed with white over background elements. This technique enhances depth whilst adding authentic atmospheric character to your landscape.
Additionally, consider the warmth of Australian sunlight. Even shadows contain warmth, particularly during morning and afternoon golden hours. Consequently, avoid pure cold shadows; instead, warm your shadow mixtures slightly with touches of sienna or ochre.
Common Mistakes to Avoid
Even experienced artists encounter pitfalls when first attempting eucalyptus landscape painting. Therefore, awareness of these common errors helps you achieve more authentic results.
Avoiding Generic Tree Approaches
The most frequent mistake involves painting eucalypts using techniques suited to European trees. Eucalypts require different structural approaches, colour palettes, and textural treatments. Moreover, they interact with light differently due to their vertical leaf orientation and open canopy structure.
Another common error involves over-detailing every element equally. Instead, establish focal areas with refined detail whilst treating background and peripheral elements more loosely. This selective focus creates visual hierarchy and prevents your painting from appearing busy or overworked.
Colour and Value Pitfalls
- Using greens that are too saturated or dark
- Failing to incorporate sufficient atmospheric perspective
- Painting shadows too cool or neutral
- Neglecting the silvery, reflective quality of eucalypt foliage
- Creating trunks with uniform colour rather than varied mottling
Furthermore, many artists underestimate the importance of negative space in eucalypt compositions. The gaps between foliage masses and the sky visible through branches contribute enormously to authentic representation. Therefore, consciously design these negative spaces as carefully as you paint the trees themselves.
Mastering eucalyptus in landscape art opens doors to authentically capturing Australia’s unique beauty. Through careful observation, appropriate colour selection, and specialised techniques, you can create paintings that genuinely reflect the character of the Australian bush. Practice these methods regularly, referring back to actual eucalypts whenever possible, and your confidence in painting these iconic trees will grow steadily. The journey towards eucalyptus mastery rewards persistence, transforming your Australian landscapes from competent to truly compelling.
Leave a Reply