Making oil paint from scratch is an enriching creative pursuit that connects artists with centuries of tradition whilst providing unparalleled control over their materials. Whether you’re seeking to understand the fundamentals of your medium or desiring to craft custom colours unavailable in commercial ranges, learning to make oil paint opens a new dimension in your artistic practice. This beginner’s guide demystifies the process, walking you through essential materials, techniques, and safety considerations that will empower you to create professional-quality paints in your own studio.
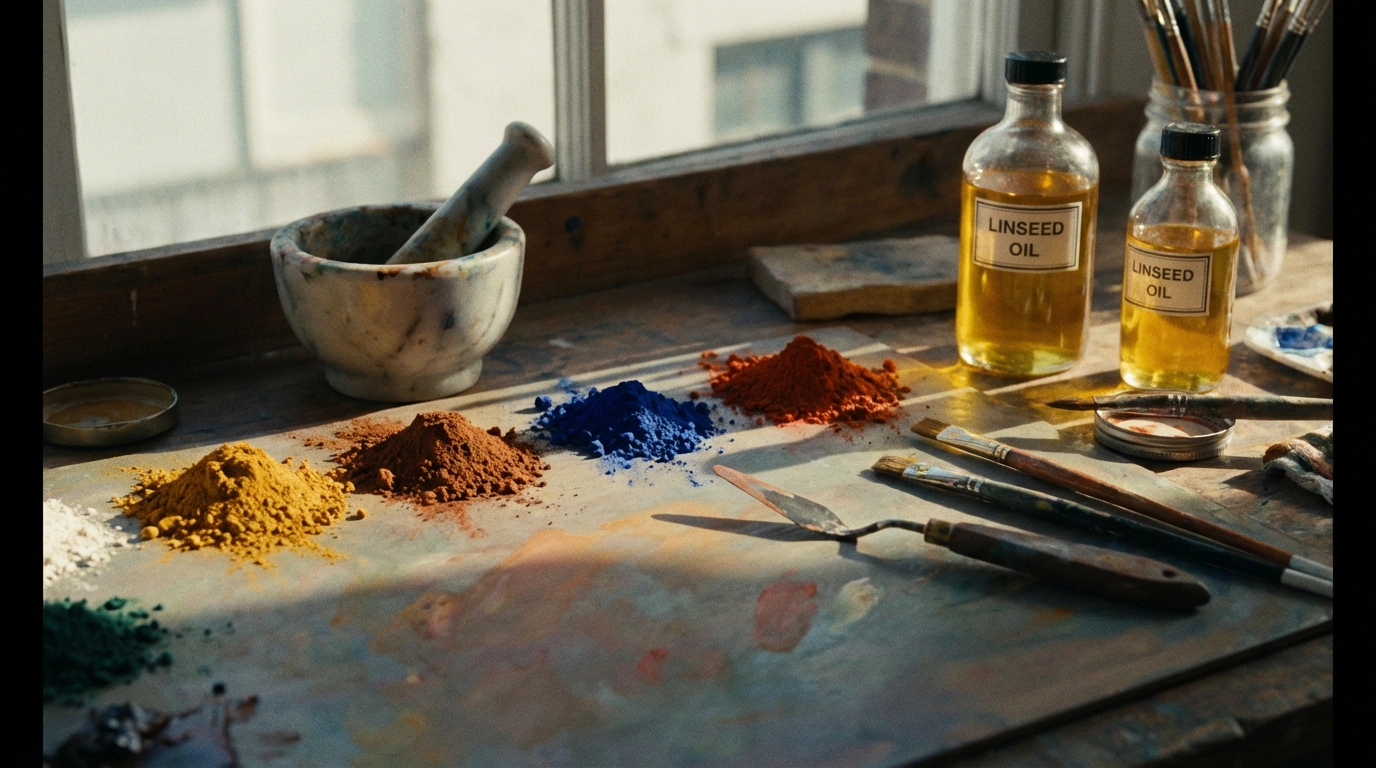
The core process of making oil paint involves combining dry pigment powder with a binding oil—typically linseed oil—to create a smooth, workable paste. You’ll need just a few essential tools: a glass muller or palette knife, a ground glass surface or marble slab for mixing, quality pigments, refined linseed oil, and protective equipment. The technique requires patience and attention to consistency, but beginners can achieve excellent results by starting with stable, non-toxic pigments like earth colours. Proper pigment-to-oil ratios and thorough grinding ensure your paint achieves the desired viscosity and colour intensity whilst maintaining archival quality for lasting artworks.
Essential Materials and Equipment
Building your paint-making toolkit doesn’t require excessive investment, but quality matters significantly. A ground glass muller (resembling a heavy glass mushroom) paired with a thick glass or marble slab forms the traditional grinding surface preferred by artists for centuries. Additionally, you’ll need a flexible palette knife for mixing and transferring paint, glass droppers for precise oil measurement, and storage containers such as small glass jars or metal tubes.
Your workspace should include adequate lighting, a stable surface, and excellent ventilation. Many pigments produce fine dust during handling, so consider working near an open window or in a well-ventilated area. A dust mask rated for fine particles protects your respiratory system during the initial pigment handling stages. Furthermore, disposable gloves prevent skin contact with potentially irritating pigments, whilst protecting the purity of your colours from oils naturally present on your hands.
Start with a modest selection of earth pigments—raw umber, burnt sienna, yellow ochre, and titanium white provide an excellent foundation palette. These stable, relatively non-toxic pigments forgive beginner mistakes whilst teaching fundamental grinding techniques. As your confidence grows, gradually introduce more complex pigments like cadmiums, ultramarines, or specialty colours that match your artistic vision and complement styles you might explore when reimagining natural subjects through diverse artistic approaches.
Understanding Pigments and Binders
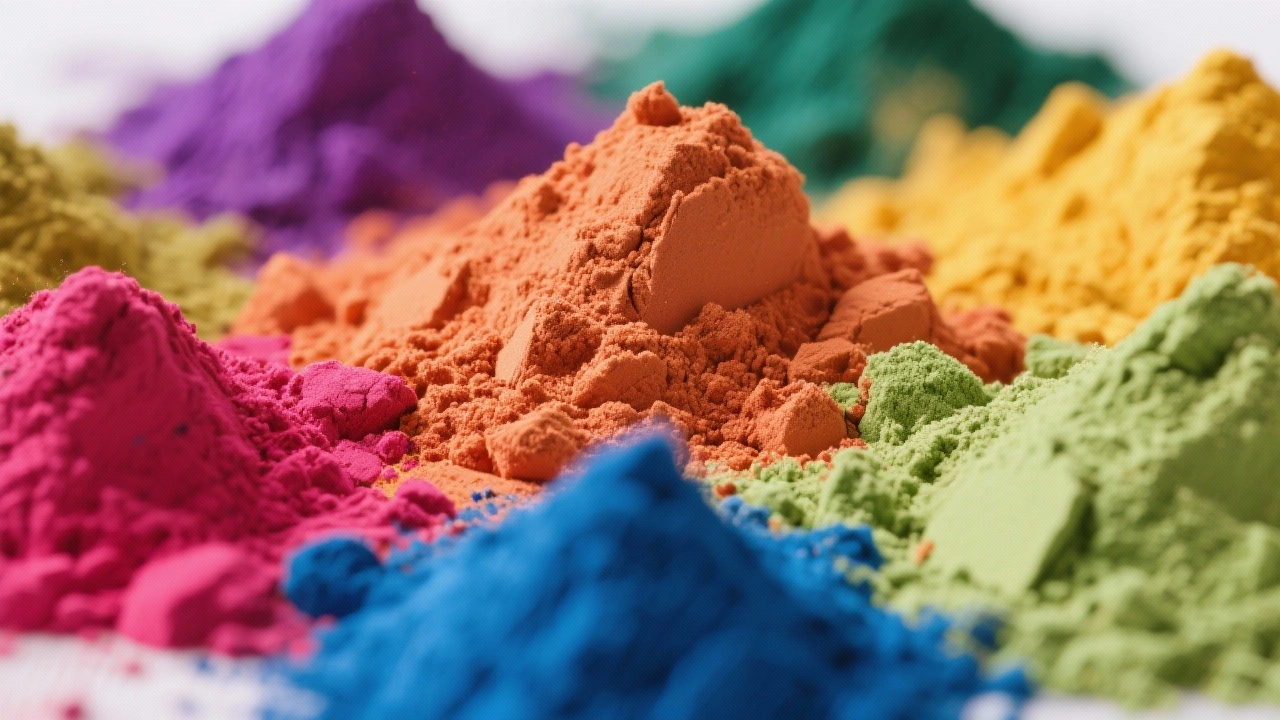
Pigments represent the colour component of oil paint, available as finely ground powders derived from minerals, synthetic compounds, or organic sources. Each pigment possesses unique characteristics including tinting strength, transparency, lightfastness, and oil absorption rates. Understanding these properties helps you predict how your handmade paint will perform on canvas and enables intelligent colour mixing decisions.
The binder—typically linseed oil—serves multiple critical functions beyond simply holding pigment particles together. It allows the paint to spread smoothly across surfaces, influences drying time, affects gloss levels, and contributes to the paint’s long-term durability. Cold-pressed refined linseed oil offers excellent clarity and moderate drying times, making it ideal for beginners. Stand oil, a heat-polymerised variant, creates enamel-like finishes with reduced brushstrokes, whilst walnut oil provides a paler, slower-drying alternative.
The pigment-to-oil ratio varies considerably between colours based on their absorption characteristics. Earth pigments generally require less oil, creating stiffer paint consistency, whereas organic pigments often demand more binder to achieve workable texture. Beginning with approximately one part oil to three parts pigment (by volume) provides a reasonable starting point, then adjust gradually based on your specific pigment and desired consistency. This experimentation mirrors the observational skills artists develop when capturing the geometric patterns found throughout nature.
Selecting Quality Pigments
Reputable pigment suppliers provide detailed information about lightfastness ratings, chemical composition, and safety classifications. Look for pigments rated ASTM I or II for lightfastness, ensuring your paintings won’t significantly fade over time. Moreover, familiarise yourself with pigment nomenclature and colour index names, which provide standardised identification regardless of marketing names that vary between manufacturers.
The Grinding Process Explained
Begin by placing a small mound of dry pigment (approximately one teaspoon) on your grinding surface, creating a well in the centre. Using a glass dropper, add small amounts of oil to the well, then gradually incorporate the surrounding pigment using your palette knife. This method prevents adding excessive oil too quickly, which creates overly thin paint that’s difficult to correct.
Once you’ve achieved a thick paste consistency, begin grinding using your glass muller. Apply firm, consistent pressure whilst moving the muller in figure-eight patterns across the surface. This grinding action breaks down pigment aggregates, creating intimate contact between each particle and the binding oil. The process typically requires five to fifteen minutes depending on pigment type and desired smoothness.
You’ll notice the mixture transforming from a grainy, separated texture into a smooth, glossy paste. Periodically scrape the paint together using your palette knife and check consistency by drawing a line through it—properly ground paint should show smooth, continuous colour without speckles or separation. This meticulous attention to texture parallels the careful observation required when artists work to capture the delicate silvery qualities of eucalyptus branches in their compositions.
Common Grinding Challenges
New paint makers frequently encounter several typical issues. Paint that feels too stiff requires additional oil, added gradually by drops rather than large amounts. Conversely, overly thin paint may need more pigment or extended grinding time to properly disperse particles. Some pigments naturally produce stringy textures; these benefit from adding a small amount of aluminium stearate, which improves handling properties without compromising colour quality.
Safety Considerations and Best Practices

Whilst oil painting carries a romantic historical association, certain pigments contain genuinely hazardous materials requiring respectful handling. Cadmium pigments, lead white, cobalt compounds, and chromium colours all demand particular caution. Always wear appropriate protective equipment including gloves and masks when handling dry pigments, and never eat, drink, or smoke in your paint-making area.
Research each pigment’s safety data sheet before purchase, understanding both acute and chronic health risks. Some traditional pigments like genuine vermilion (mercury sulphide) or flake white (lead carbonate) have safer modern alternatives that achieve similar visual effects without toxic concerns. Beginning painters should prioritise learning with safer alternatives, reserving more hazardous materials for when experience justifies their use.
Proper disposal of contaminated materials protects both your household and the environment. Never wash pigment-laden materials down household drains; instead, allow contaminated water or oils to evaporate in a well-ventilated area, then dispose of dried residue according to local hazardous waste guidelines. This conscientious approach to materials extends naturally to artists who appreciate the environmental stories behind their artistic subjects.
Storing and Preserving Your Handmade Paints

Freshly made oil paint requires protection from air exposure, which causes surface skinning and eventual hardening. Small glass jars with tight-fitting lids work excellently for storage, though metal tubes (available from art supply specialists) provide professional-grade preservation and convenient dispensing. When filling tubes, eliminate air pockets by tapping the tube firmly against your work surface before sealing.
Create a thin layer of water or linseed oil atop paint stored in jars, forming a barrier that prevents oxygen contact with the paint surface. Additionally, clearly label each container with the pigment name, date of creation, and any special notes about oil ratios or additives used. This documentation proves invaluable when replicating successful batches or troubleshooting inconsistent results.
Properly stored handmade oil paints remain usable for months or even years. However, some separation between pigment and binder naturally occurs over time. Simply remix thoroughly before use, adding minute amounts of oil if needed to restore proper consistency. If you’re ready to start exploring your handmade paints on canvas, visit our shop to discover quality surfaces and materials that complement your artistic journey.
Troubleshooting Storage Issues
Paint that develops hard surface skin can often be salvaged by carefully removing the dried layer and remixing the remaining paint. Completely hardened paint, unfortunately, cannot be reconstituted and must be discarded. Mould growth occasionally appears in paints containing excessive water contamination; prevent this by ensuring all tools and pigments remain completely dry during the paint-making process.
Embracing the Craft of Paint Making
Making your own oil paint transforms your relationship with artistic materials, fostering deeper understanding of how colours behave and interact. This foundational knowledge empowers more confident colour mixing, informed material choices, and greater appreciation for the chemical and physical properties underlying oil painting techniques. Moreover, the meditative rhythm of grinding pigments provides creative satisfaction that extends beyond simply opening manufactured tubes.
As you develop paint-making skills, experiment with different binders, additives, and pigment combinations that support your unique artistic voice. Consider how historical masters prepared their materials, then adapt these time-tested methods to contemporary availability and safety standards. The journey from raw pigment to finished painting creates an unbroken creative thread connecting your hands, your materials, and your artistic vision—a deeply personal process that enriches every brushstroke you make on canvas.

|
joerussell Australian abstract artists based in Byron Bay and curator of the GumPrints art print collection. |
Leave a Reply